Easy Custom Touches: How Beginner Riders Can Use Airbrush Paint to Make Their Bike Stand Out | Misc
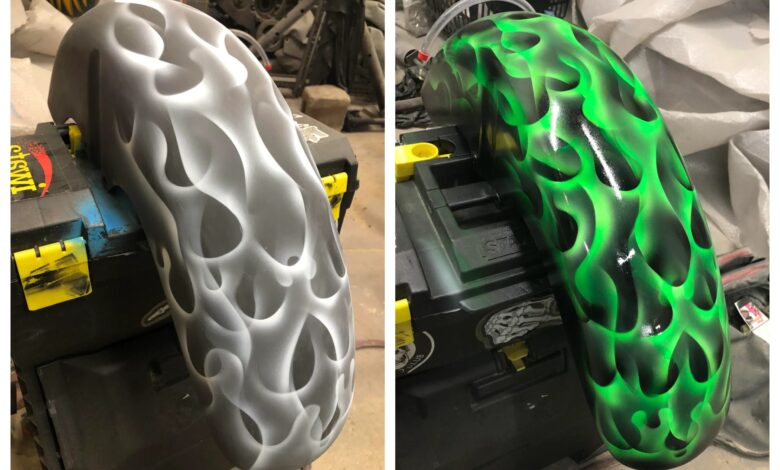
While most beginners aren’t ready for a full teardown or respray, airbrush paint opens the door to creative, low-risk customization. From subtle details on your helmet to unique graphics on side panels, you can transform your motorcycle’s look without needing professional skills or a massive budget.
Why Airbrush Customization is Beginner-Friendly
Airbrushing is a popular entry point for new riders who want to personalize their gear or bike. Unlike traditional spray painting, airbrushing gives you precise control over paint flow and detail, making it perfect for smaller, more artistic projects.


Most importantly, it’s scalable. You can start small such as adding a single color fade or stylized lettering, and then gradually take on more complex ideas as your confidence and technique improve.
Where to Buy High-Quality Airbrush Paints
Not all paint is created equal, and using the right product can make a huge difference in durability and finish.


For beginners looking to experiment with high-quality, reliable results, several reputable online sources are offering a wide range of airbrush paints formulated for use on motorcycles and gear.
These products include pearl, candy, matte, and color-shifting options which give you the flexibility to start small but still make an impact with your customizations.
Beginner-Friendly Customization Projects
Here are a few creative ways new riders can experiment with airbrush paint without needing a full paint booth or advanced tools.
Fuel Tanks and Side Panels
Fuel tanks can seem intimidating, but sticking with a simple design can make this very achievable for a newbie. For example, straight lines and masking can produce some extremely interesting patterns and add visual interest. This Redditor, diegojansen7, shared his first attempt ever airbrushing.


Compared to fuel tanks, side panels are usually made from plastic, making them lightweight, detachable, and easy to experiment on. They’re also positioned in a way that lets you showcase your design without it dominating the entire bike.
Because they’re flat or slightly contoured, they’re ideal for practicing smooth color fades, simple stencils, or accent graphics. Some riders even opt for subtle ghost flames, tribal patterns, or color-matching their gear. If you mess up, replacement side panels are often inexpensive which makes this a great low-risk starting point.
Helmets
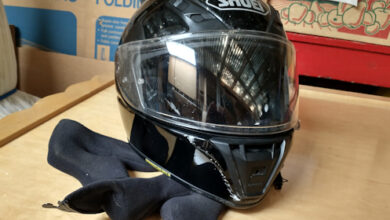
Helmets are one of the most popular canvases for custom airbrush work. A painted helmet can add flair and it becomes an extension of your personality on the road. If you set your expectations accordingly and don’t expect perfection or a work of art, you can repaint your helmet into your own design.
For instance, another Redditor painted his Fox Racing Proframe motocross helmet.


Just make sure you’re painting over a smooth, clean surface and that you mask off vents, visors, and interior padding (remove all the guts if you can). Always finish with a durable clear coat for added protection against UV rays and road debris.
Fenders & Accent Lines
Fenders are perfect for small-scale artistry. Since they’re usually curved, you can experiment with pinstripes, edge fades, or detailed linework that complements your bike’s overall color scheme.


A subtle flame outline or gradient edge near the wheel well can make the bike look sportier without going overboard. You can also match fender accents to details on your helmet or jacket for a cohesive look.
Touch-Ups and Repairs
If your bike has minor dings, scratches, or faded spots, airbrushing is a great way to blend in repairs while adding some style.


Unlike traditional touch-up pens, airbrushing gives you a smoother, more even finish. It also gives you room to get creative. For example, you can turned a scuffed tank corner into an opportunity for a minimalist graphic or pin-up-style artwork.
If you’re planning to address blemishes before customizing, take a look at our full guide to touching up your motorcycle paint for detailed prep and color-matching advice.
Tools and Gear to Get Started


You can build a basic airbrush setup for less than you think. Here’s what most beginner kits include:
- A dual-action airbrush
- A small compressor
- Practice paper or plastic
- Basic stencils, tape, and masking film
- Paint cleaner, gloves, and respirator mask


Surface Prep and Safety
- Work in a well-ventilated area with minimal dust.
- Sand the surface lightly and clean thoroughly before spraying.
- Always wear a respirator, especially when working with solvent-based paints.
- Practice on scrap materials or panels before painting your actual parts.
For a full walkthrough on prepping, layering, and sealing your custom paint job, check out this step-by-step guide on how to apply your motorcycle paint.
Final Tips for Success
- Start Small – Focus on one part at a time to build confidence and technique.
- Thin, Light Layers – Apply multiple coats gradually rather than one thick layer.
- Use a Clear Coat – Always protect your design with a top coat rated for UV and weather resistance.
- Don’t Rush – Allow proper drying time between layers and after the final clear coat.
Make It Yours
Your bike doesn’t have to look like everyone else’s. Even as a new rider, you can start adding personality and flair through simple, safe airbrush techniques. Whether it’s your helmet, side panels, or a small accent on the tank, a little creativity goes a long way and airbrush paint gives you the perfect tool to make your mark.
